How To Upgrade Or Downgrade Your Plan?
This guide will show you how to switch between different plans in the ZipWP platform.
For example, if you are currently on a Business plan of ZipWP and want to switch to a Pro plan instead, you can do it by yourself.
Just go to your ZipWP dashboard and follow a few simple steps to change your current plan.
Here are the steps that you need to follow:
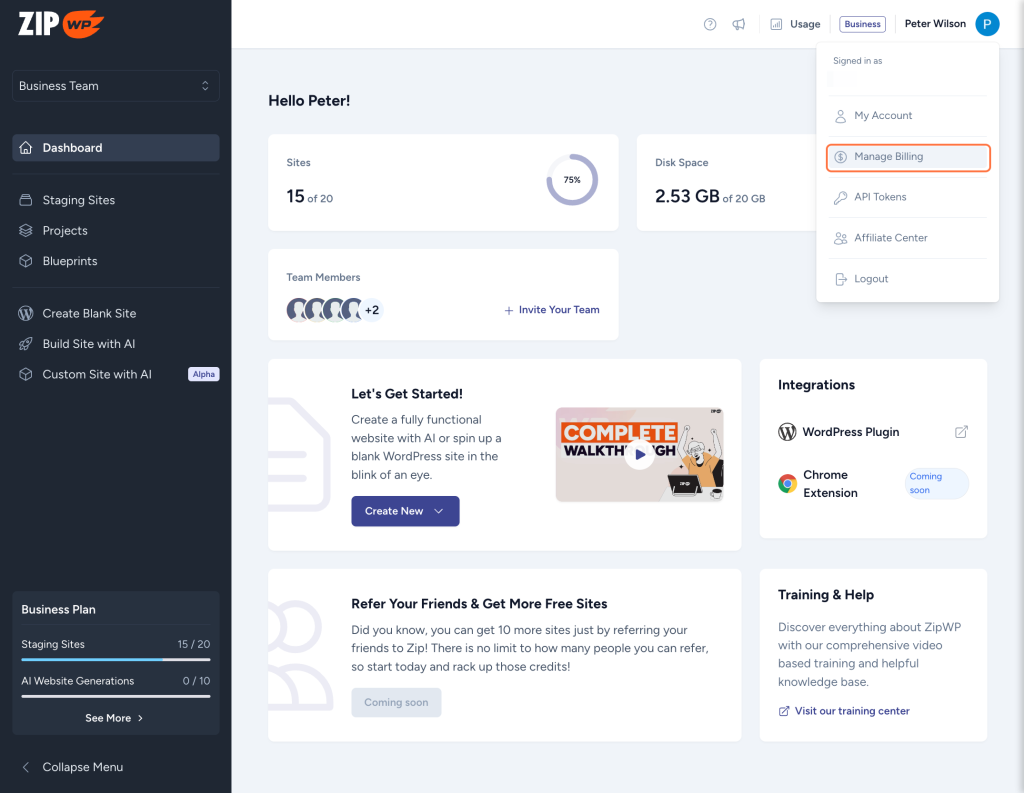
- Go to the ZipWP dashboard.
- Click on your profile and click on the Manage Billing/Manage Plan option.

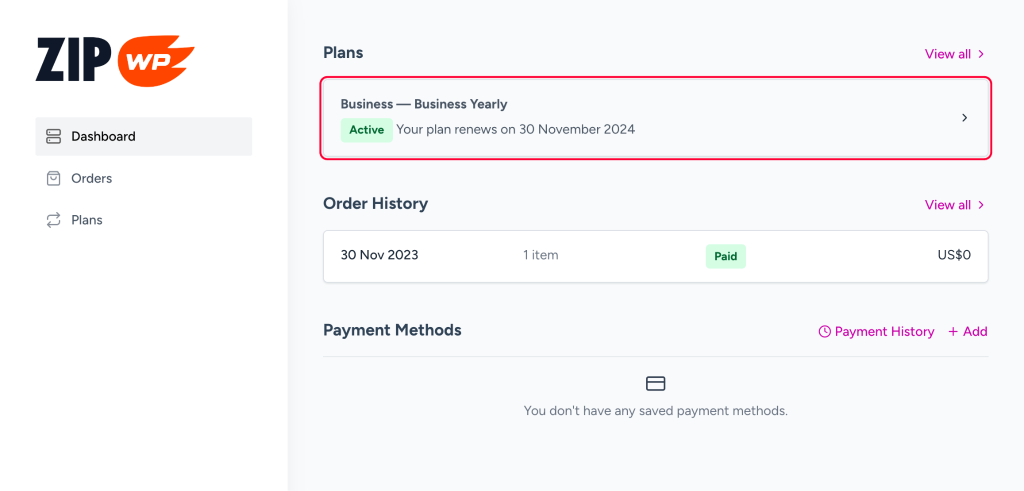
- On your Billing dashboard, you’ll find your active ZipWP plans. Click on the plan that you want to upgrade or downgrade.

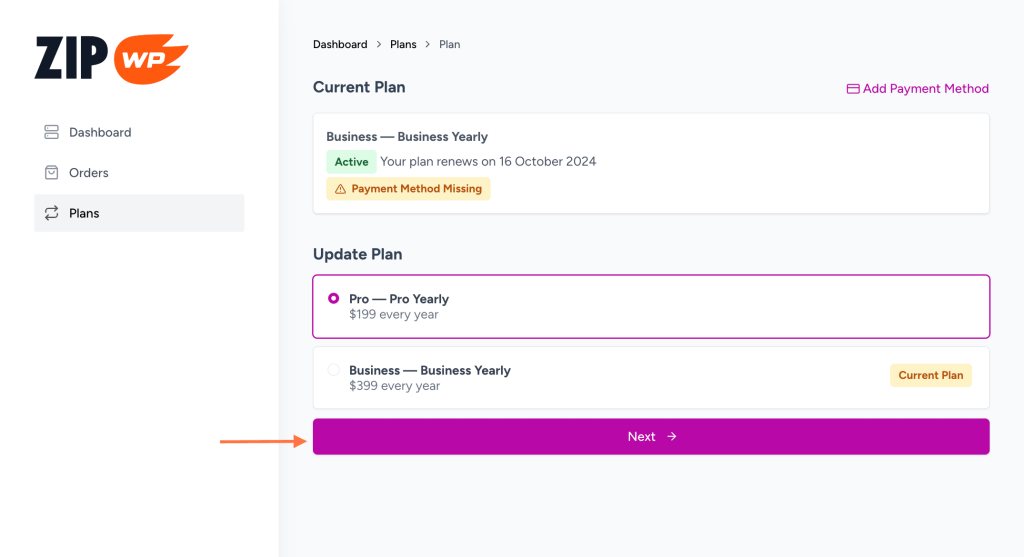
- Next, under the Update Plan section, choose the plan you wish to switch to and click on the Next button.

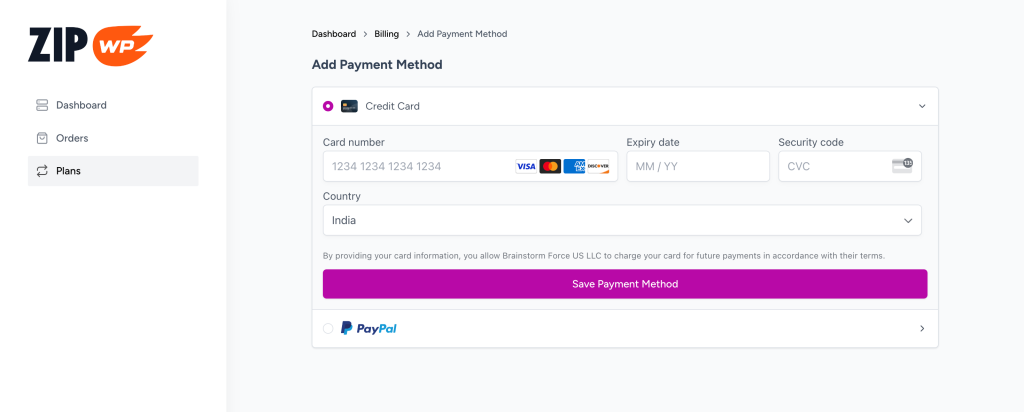
- Select and save the preferred payment method by entering the needed payment information.

On the next screen, review the due amount summary if any, and click the Confirm button. This schedules a plan upgrade upon the next billing date.
That’s it! Your plan will be scheduled for an upgrade or downgrade.
To simplify billing calculations during upgrades and downgrades, we’ve kept things simple. When you downgrade a plan, the downgrade is scheduled for the next billing cycle, eliminating the proration of charges.
This allows you to continue enjoying your higher plan features until the next billing date. When the next billing date arrives, your plan will be downgraded to the one you choose.
In the case of upgrading a plan, your upgrade will happen immediately so you can start enjoying the benefits of the higher plan right away.
Hope this document helped you understand the process of downgrading or upgrading your Zip plans. However, if you still have questions, please feel free to contact us!
We don't respond to the article feedback, we use it to improve our support content.